Basement Home Theater: Planning Guide for Below-Grade and Lower-Level Rooms
A basement is the most acoustically favorable room in most homes. No shared walls with living spaces above, no natural light to fight, ground contact on multiple sides for thermal mass, and structural isolation from the foot traffic, HVAC noise, and ambient sound of the floors above. That combination is why dedicated home theaters in the national design press almost always feature basement rooms.
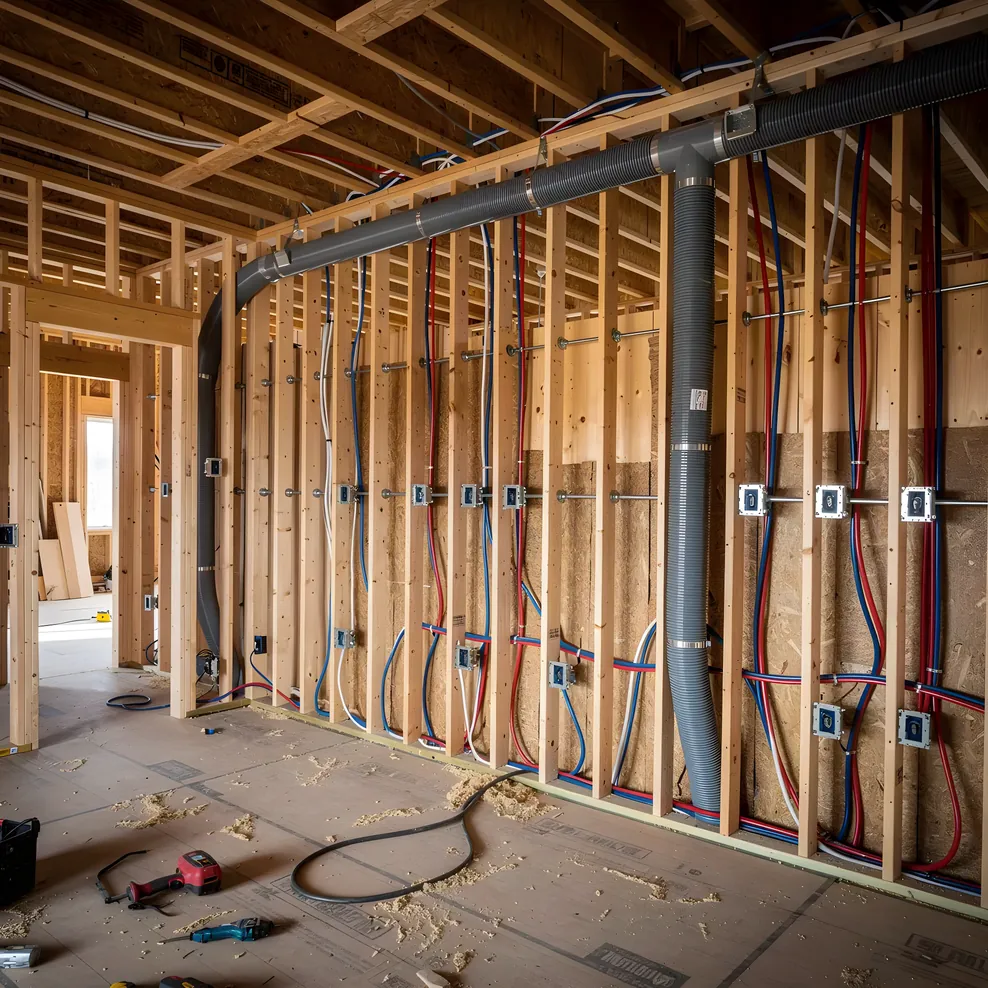
For Bay Area homeowners, this creates an immediate complication: most Bay Area homes don't have basements. Slab-on-grade construction is standard across the region. If you've been reading national basement home theater guides and wondering how to apply any of it, the honest answer is that most of the specific structural advice doesn't translate directly. What does translate is understanding why the basement works so well as a theater space, and what in your home can replicate those conditions.
This guide covers both tracks. For homeowners with an actual below-grade or walkout lower level, it works through the five physical challenges that define every basement conversion: moisture, ceiling height, natural light, acoustic isolation, and HVAC. For Bay Area homeowners without a basement, the final section addresses the alternatives that come closest to replicating what makes a below-grade room so effective.
Why a Basement Works as a Home Theater
Before getting into the practical challenges, it helps to understand why the basement is the preferred room for dedicated theaters. Below-grade spaces have four structural advantages that are difficult to replicate in above-grade rooms.
First, acoustic isolation from the rest of the house is inherent. Sound transmission between floors is one of the hardest problems in home theater design. In a basement, the floor above you is the ceiling, and below-grade concrete walls don't transmit sound the way wood-framed stud walls do.
Second, light control is close to absolute. A below-grade room typically has no windows, or small high windows that are easy to blackout completely. A projector image depends on darkness. The darker the room, the better the contrast, and the more latitude you have in projector selection.
Third, thermal mass from the surrounding soil keeps the space cooler in summer and more temperature-stable year-round. This matters for electronics longevity and for comfort during long viewing sessions.
Fourth, a basement is typically below living spaces, not adjacent to them. Bass from subwoofers travels through structure, not just air. A room that sits beneath a bedroom will cause problems; a room that sits adjacent to a garage or mechanical room will not.
Moisture: Address This Before Anything Else
Moisture is the first-order problem in any below-grade space, and finishing a basement before resolving it is a mistake that costs far more to fix than it would have to address from the start.
There are two distinct moisture problems in basements, and they require different solutions. The first is condensation, where warm humid air meets the cooler surface of the concrete and deposits moisture. The second is water intrusion, where water migrates through the concrete itself or through cracks.
Test for both before you frame a single wall. Tape 12-inch squares of 6-mil plastic sheeting to the floor and to each wall in multiple locations, seal all four edges with duct tape, and leave them for 48 to 72 hours. Moisture beading on the room-facing surface of the plastic indicates condensation from the air. Moisture forming on the concrete-facing surface of the plastic, or pooling under the plastic, indicates water coming through the concrete.
Condensation is manageable with a quality dehumidifier and vapor barriers installed before the subfloor and insulation go in. Active water intrusion through the concrete requires an interior drainage system and sump pump, or exterior waterproofing membranes applied to the foundation, before any finishing begins. AV equipment and acoustic panels in a space with unresolved moisture will fail. There's no point-of-use fix for this.
Ceiling Height: What You Need and What to Do When You Don't Have It
The practical minimum for a finished basement home theater is 8 feet of ceiling height from the subfloor to the finished ceiling surface. Below that, overhead speaker placement becomes constrained, and the addition of any dropped ceiling for acoustic panels or HVAC ductwork routing quickly becomes a problem.
Most residential basements have 8 to 9 feet of floor-to-joist clearance, but that's before any of the mechanical systems running through the joist bay are accounted for. Ductwork, plumbing, electrical conduit, and beam pockets all eat into that clearance. Getting 8 feet of finished ceiling height in a basement with 8 feet of raw clearance requires routing every mechanical system through carefully coordinated soffits or furred-down sections.
Two approaches to the ceiling work at different clearance levels. A dropped acoustic tile ceiling is a cost-effective option in spaces with enough clearance to absorb the 4 to 6 inches it consumes. Suspended grid ceilings allow access to mechanical systems above and accept standard acoustic tile. An exposed or painted drywall ceiling, on the other hand, requires routing all mechanical systems before the ceiling is closed. It produces a cleaner look and loses no ceiling height to a grid system, but it demands precise coordination with your contractor before rough-in is complete.
For Dolby Atmos height channels, overhead speaker placement ideally puts the speaker at 40 degrees above the primary listening position. In a room with an 8-foot finished ceiling and a seated ear height of roughly 36 to 38 inches, that geometry works out. Drop to 7.5 feet and the math gets tight. If your basement ceiling falls short, in-ceiling speakers angled toward the listening position (rather than firing straight down) and Atmos-enabled speakers on the front and rear soundstage can partially compensate.
Natural Light Control in a Below-Grade Room
Below-grade rooms with no windows are the simplest case: paint the ceiling and upper walls dark, and you're done. More common are basements with small transom windows near ceiling level, or walkout lower-level rooms with full windows and sliding doors.
Transom windows can be addressed with opaque blackout shades or painted over if they don't serve a code-required egress function. Before covering any below-grade window, check whether it's the room's egress exit. Building codes require a minimum egress opening in any habitable below-grade space. The International Residential Code specifies a minimum opening of 5.7 square feet, with the sill no more than 44 inches from the finished floor. Covering or reducing that opening requires adding a different code-compliant egress point.
Walkout lower-level rooms with full glass doors and windows require motorized blackout shades or blackout drapes capable of achieving 95 to 100 percent blockage. Any light that enters the room during daytime viewing competes directly with the projector image. This isn't a matter of preference; contrast ratio is a physical measurement of the difference between the brightest and darkest points on the screen, and ambient light from a window directly degrades it. For rooms where full blackout isn't achievable, a large-format display panel performs better under ambient light than a projector will.
Insulation: Acoustic and Thermal Together
In a basement home theater, insulation serves two distinct functions that can be addressed in the same wall and ceiling assembly, but require separate planning.
Thermal insulation keeps the below-grade space at a stable temperature and reduces the load on whatever HVAC system serves the room. Concrete foundation walls are excellent thermal mass but poor insulators. Continuous rigid foam insulation applied to the interior face of the foundation wall before framing is the standard approach. Two inches of rigid foam (approximately R-10) against concrete, with a 2x4 framed wall built out from it, gives you a thermal break and a cavity for additional batt insulation and electrical runs.
Acoustic insulation addresses sound transmission between the theater and the rest of the house. Dense-pack cellulose or mineral wool batts in the partition walls and floor/ceiling assembly perform better than standard fiberglass for acoustic applications. If the room above the basement is a bedroom or living area, the ceiling assembly deserves particular attention. Resilient channel or sound isolation clips (sometimes called hat channels or RSIC clips) mechanically decouple the drywall from the joist structure, which significantly reduces impact noise and low-frequency transmission.
The home theater acoustics guide covers in-room acoustic treatment separately from the structural soundproofing work described here. Both matter; they address different problems.
Flooring on a Concrete Slab
The concrete slab in a below-grade space is cold, hard, and dimensionally stable. Each of those qualities shapes your flooring options.
Carpet over a quality foam or rubber pad is the practical choice for most dedicated home theaters. It absorbs mid- and high-frequency sound reflections at floor level, which reduces flutter echo between the floor and ceiling. The pad provides thermal separation from the slab and makes sitting on the floor more comfortable during casual use. Color selection is worth considering: dark carpet with a tight loop pile reads as intentional in a private cinema environment.
Luxury vinyl plank (LVP) with a factory-attached or separately installed acoustic underlayment is a reasonable alternative. It's more moisture-tolerant than engineered hardwood, easier to clean, and available in finishes that hold up visually in a dim room. The acoustic underlayment reduces impact sound transmission and provides some thermal benefit. LVP is a sensible choice in multi-use rooms that function as both a theater and a general family space.
Avoid solid hardwood directly on concrete. Wood requires humidity levels that fluctuate seasonally in below-grade spaces, and direct-contact installation over a slab is prone to cupping and warping. If the design calls for a wood look, engineered hardwood is more dimensionally stable than solid, but LVP is the more durable choice for a below-grade environment.
A sleeper floor (a layer of treated 2x4s laid flat on the slab with rigid foam between them and subfloor over the top) adds thermal separation and allows a wood or LVP finish that floats slightly above the slab. It also provides a pathway for perimeter cables without surface raceways. The tradeoff is the roughly 2.5 inches of height it consumes.
HVAC and Ventilation in an Enclosed Space
A sealed home theater generates significant heat from the AV equipment. A high-brightness projector alone produces 300 to 600 watts of heat. Add a receiver, a multichannel amplifier, a streaming device, and the body heat of four to eight people, and a below-grade room that started at a comfortable temperature will be noticeably warmer after two hours of use.
The starting point is dedicated supply and return air. A single supply register left over from the mechanical room on the other side of the basement is not sufficient for a finished theater room. Before the room is closed up, have the HVAC system assessed for whether it can extend adequate capacity to the space. In many cases, a supplemental ductless mini-split is the most practical solution for basement theater rooms, because it can be sized precisely for the room's load without requiring modifications to the primary HVAC system.
The acoustic challenge with HVAC is ductwork noise. A quiet theater reveals sounds that are inaudible in an everyday room. Duct rumble and air turbulence through registers are two common sources of in-room noise that become apparent only during quiet film passages. Flexible duct between the plenum and the room register dampens mechanical vibration better than rigid sheet metal. Locate supply registers in positions where airflow doesn't blow directly across the primary listening area. Variable-speed air handlers are significantly quieter than single-speed units, and the cost difference is recoverable in comfort and operational noise.
Equipment rack ventilation deserves a separate plan. A closed cabinet full of amplifiers and a receiver will overheat if it lacks active cooling. Perforated rack panels, a quiet equipment cooling fan, and cable management that doesn't block airflow keep equipment running at stable temperatures. The home theater planning guide includes a section on rack placement and ventilation planning as part of the broader pre-construction checklist.
The Bay Area Reality: What Works Instead of a Basement
Most Bay Area homes don't have traditional basements. The region's seismic zone and prevailing construction methods over the past century made slab-on-grade foundations the default. Knowing this, here's how the available alternatives stack up against the basement's four core advantages.
Hillside homes with walkout lower levels are the closest equivalent. A below-grade lower level that opens to grade on one side has the acoustic mass of ground contact, the thermal stability, and separation from living areas above. The one difference is natural light on the walkout side. With good blackout treatment on those windows, a walkout lower level performs as well as a true basement.
Garage conversions are the most common Bay Area approach for a dedicated cinema room. A detached garage is already acoustically separated from the house, sits on a slab, and has no neighbors above it. The challenges are thermal insulation (garage walls and roofs are typically uninsulated), HVAC extension, and permitting for change of use. In most Bay Area jurisdictions, converting a garage to habitable space requires permits for electrical, HVAC, and building. The permitting reality is covered in more depth in the Bay Area home theater guide.
Ground-floor interior rooms, such as a den or study at the front or back of the house away from sleeping areas, offer acoustic isolation from the floors above without the moisture or ceiling height complications of a true basement. The limits are shared walls with adjacent rooms and, in most cases, at least one exterior window to manage. These rooms are the most common starting point for dedicated home cinemas in Bay Area Craftsmans and Victorians.
ADU conversions, particularly detached backyard units or garage ADUs, share many qualities with the garage conversion but come with their own regulatory considerations under California's ADU laws. For homeowners planning an ADU already, designing the space with a theater function from the start is far less expensive than adapting an existing finished ADU later. For guidance on design decisions before the build, the dedicated home theater guide covers what it takes to design a room from scratch for cinema use.
Frequently Asked Questions
What ceiling height do you need for a basement home theater?
The practical minimum for a basement home theater is 8 feet of finished ceiling height. Below that, ceiling-mounted surround speakers (required for Dolby Atmos height channels) become difficult to place correctly, and the room can feel oppressively low once acoustic panels and a dropped ceiling are added. Nine feet finished is comfortable for most configurations. Rooms with 7.5 feet or less typically work better with a soundbar or in-wall speaker system rather than a full overhead speaker layout.
Do Bay Area homes have basements?
Most do not. The majority of Bay Area homes were built on slab-on-grade foundations, which means there is no below-grade space at all. Exceptions exist: hillside homes in areas like Berkeley Hills, Marin, and parts of the Peninsula often have walkout lower levels that function like basements. Some older Victorians and Craftsmans have partial basements used for mechanical systems. For most Bay Area homeowners, the practical alternative to a basement home theater is a ground-floor interior room, a garage conversion, or an ADU.
How do you control moisture in a basement home theater?
Moisture control starts before any framing or finishing work begins. Test for active water intrusion by taping 12-inch squares of plastic sheeting to the floor and walls in multiple locations, sealing all edges, and leaving them for 48 to 72 hours. Moisture beading on the surface of the plastic indicates condensation from humid air. Moisture forming under the plastic indicates water migrating through the concrete. Each requires a different solution: dehumidification and vapor barriers for condensation, waterproofing membranes and drainage systems for active seepage. Electronics and speakers in a space with unresolved moisture problems will fail prematurely.
What flooring works best for a basement home theater?
Carpet over a quality pad is the standard for basement home theaters. It absorbs mid- and high-frequency sound reflections from the floor, and the pad provides thermal separation from the cold concrete slab. For a finished aesthetic with some acoustic benefit, luxury vinyl plank (LVP) with an acoustic underlayment is a practical option. Avoid hardwood directly on concrete. Wood needs to acclimate to humidity levels that fluctuate seasonally in below-grade spaces, and direct-contact installation over concrete is prone to warping.
Do you need an egress window in a basement home theater?
Building codes in most jurisdictions require an egress window or door in any habitable below-grade space. The International Residential Code (IRC) specifies a minimum opening of 5.7 square feet, with a minimum opening height of 24 inches and minimum width of 20 inches, with the sill no more than 44 inches from the floor. If your basement already has windows, have them measured before finishing the room. Adding an egress window opening to an existing below-grade foundation wall is a significant excavation and structural job, typically $3,000 to $7,000 depending on the depth of the window well and soil conditions.
How do you handle HVAC in a basement home theater?
A basement home theater generates meaningful heat from the projector, AV receiver, and amplifiers, and it needs dedicated supply and return air. If the existing HVAC system doesn't reach the basement, or reaches it with a single register that's insufficient for a sealed room, an HVAC contractor will need to extend ductwork or add a supplemental mini-split. The bigger acoustic challenge is ductwork noise. Flexible duct dampens vibration better than rigid sheet metal, and supply registers should be positioned away from the primary listening area to prevent direct airflow noise during quiet film passages.
Where to Take the Design from Here
Once the structural and environmental conditions of a below-grade room are resolved, the design decisions follow the same logic as any dedicated cinema room. Screen size and projector selection depend on room dimensions and throw distance. Seating layout depends on available depth and the number of rows. Acoustic treatment addresses what the room does to sound once it's inside.
The home theater room dimensions guide works through the specific geometry: minimum room sizes, projector throw calculations, and seating distance guidelines for single- and dual-row configurations. The home theater seating guide covers row spacing, riser height, and the tradeoffs between recliner configurations and sofa-style seating.
For Bay Area homeowners ready to move from planning to finding an installer, the Bay Area home theater installers directory lists specialists across the East Bay, Peninsula, South Bay, Marin, and San Francisco who work in both traditional below-grade rooms and the converted spaces common in the region. The complete planning guide collection is at Bay Area Home Cinema.