Home Theater Lighting Design
Lighting is where home theater design and interior design converge most directly. Equipment selection — projectors, receivers, speakers — is largely a performance exercise. Lighting design is that too, but it is also an aesthetic problem. The room has to work in the dark during a film, but it also has to look and feel right when the lights are up.
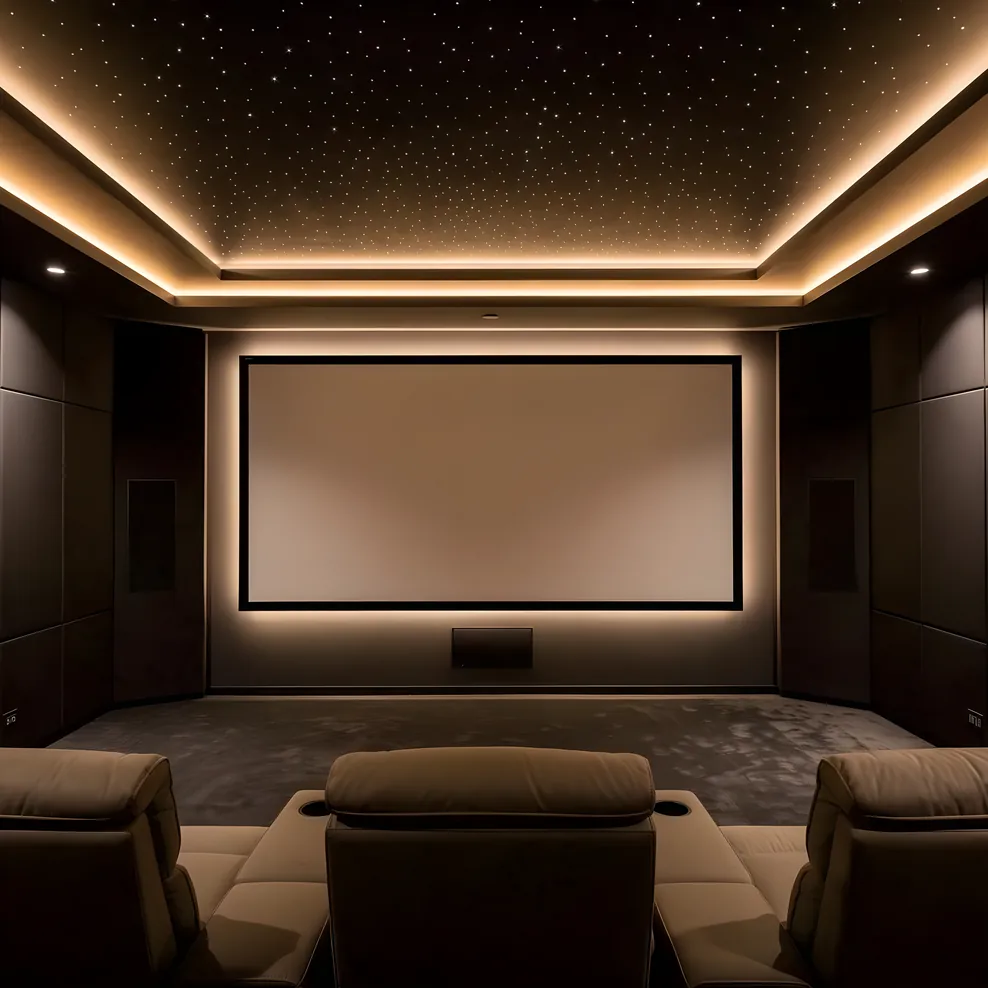
Getting this right means thinking in layers: what controls the ambient environment during viewing, what illuminates the room between films, how occupants move safely through a dark space, and how all of it responds to a single command rather than six separate switches.
Why Lighting Design Matters for Picture Quality
The relationship between room lighting and image quality is direct and measurable. A projector produces a maximum brightness, typically measured in lumens or nits. That brightness competes with every other light source in the room. Overhead fixtures, windows, even the glow from a standby LED on a receiver — all of it reduces the perceived contrast ratio of the image.
Contrast ratio is the range between the darkest and brightest parts of a projected image. It determines how rich blacks look and how much visual depth the picture has. A projector rated at 10,000:1 contrast ratio in a perfectly dark room might deliver the equivalent of 500:1 in a room with uncontrolled ambient light. The projector did not change. The room made it worse.
This is why lighting control is not a convenience feature in a home theater — it is a fundamental performance variable, as significant as the projector specification itself.
Bias Lighting: The First Priority
Bias lighting is a strip of LED light mounted behind the projection screen or display, pointed at the wall behind it. It creates a soft glow around the image perimeter.
The effect sounds counterintuitive. If you are trying to control light in the room, why add light? The answer lies in how the human visual system adapts to average scene brightness. When your eyes adjust to a very bright image against a completely dark surround, the contrast between the screen edge and the dark wall creates strain over the course of a two-hour film. The bias glow reduces that apparent gap, so the eye is adapting to a slightly brighter average scene, which reduces fatigue without adding the kind of diffuse ambient light that would wash out the image.
The specification that matters is color temperature. Bias lighting should be 6500K, which is the D65 white point standard used in cinema display calibration. If your bias lighting is warmer (the 2700K or 3000K range typical of residential LEDs), it shifts your color perception during viewing. Dedicated home theater bias lighting strips are sold at D65 specifically for this reason.
Brightness should be set to approximately 10% of the screen's peak white output. Most bias lighting products include a dimmer for this purpose, and some integrate directly with lighting control systems so the level adjusts automatically based on the viewing mode.
Installation is simple for a flat-wall screen: LED strip tape adhered to the back of a panel or frame, with the strip angled so the light disperses toward the wall rather than toward the viewer. For projector screens mounted on a wall, the strip goes behind the screen frame, set back slightly from the edge so the glow spills onto the wall without creating a visible hot spot.
Overhead Lighting: Dimmable Scenes, Not Just Dimmers
The overhead lighting in a home cinema serves two functions that are at odds with each other. Before and after a film, you want enough light to move around comfortably, see where you set your drink, and read physical media cases if you have them. During a film, you want the overhead lights off completely — not dimmed to a low level, but off.
The instinct for many homeowners is to install a single dimmer and call it done. The problem is that a dimmer does not create a scene. It adjusts one circuit. A room typically has multiple circuits: overhead fixtures, step or aisle lighting, wall sconces if the design calls for them. A scene controller puts all of those circuits under a single command, so pressing "Movie" brings the overheads to zero, dims the step lights to their safety level, and sets the bias lighting to its calibrated brightness. Pressing "Intermission" reverses it.
For the overhead fixtures themselves, the type of fixture and its placement matter. Recessed can lights pointed directly at the seating area create glare spots. Indirect fixtures that bounce light off the ceiling distribute it more evenly and feel softer. Wall wash fixtures mounted high on the side walls add dimension to the room's appearance when lit.
Color temperature for overhead lighting in a home theater is typically in the 2700K to 3000K range — warmer than the bias lighting, appropriate for a room that should feel comfortable and residential rather than clinical. The overhead fixtures are rarely on while the projector is running, so their color temperature does not interfere with image calibration.
Step and Aisle Lighting
Any home theater with a raised seating tier needs step lighting. This is a safety requirement that also serves the room aesthetically when executed well.
The standard approach is LED strip tape recessed into the front face of the riser, pointing downward to illuminate the step surface without throwing light toward the screen. The strip should be on a separate dimmer circuit from the overhead lighting so it can remain on at low brightness during a film while the overheads are off.
Aisle lighting, distinct from step lighting, runs along the base of the side walls to mark the path from the entry door to the seating. In a small room with two or three seats, aisle lighting may be unnecessary. In a larger room with multiple rows or a room where the entry is not adjacent to the seating, it is worth including.
Both step and aisle lighting should use 2700K or 3000K warm-white LEDs. Cool white LEDs at these locations pull the eye away from the screen during viewing, which is the opposite of what you want from a safety light.
Blackout Solutions for Bay Area Homes
This is where Bay Area homes present a specific challenge that national home theater guides largely ignore. A significant portion of Bay Area residential construction, particularly in the Peninsula, Marin, and hillside neighborhoods of the East Bay, includes large windows. Mid-Century homes in particular were designed to maximize views and natural light. An Eichler or a Cliff May ranch house may have floor-to-ceiling glazing on an exterior wall that is now being considered for a media room or home cinema.
A room with large windows and no light control cannot function as a home theater during daylight hours. This is not a minor limitation. It means the room is unusable for films from roughly 8am to 6pm in summer without window treatment.
The solution is layered and it starts with the window treatment, not the projector specification.
Blackout roller shades are the primary block. These are fabric shades that, when fully lowered, block essentially all light transmission. The quality varies significantly. Inexpensive roller shades allow light leakage at the edges, particularly at the sides where the shade fabric does not reach the wall. Properly specified blackout shades use a side channel or recessed pocket installation to close off this gap. The difference between a correctly installed blackout shade and an incorrectly installed one in a sunny room is significant.
Motorized shades integrated with the lighting control system are worth the additional investment in a Bay Area home theater. When the shade is motorized and tied to your scene controller, pressing "Movie" closes the shades, dims the lights, and activates the projector input in a single action. This changes how the room gets used. If closing the shades requires a manual trip to each window, people start watching films in suboptimal light conditions because the activation friction is too high.
Blackout drapery layered over the roller shades adds a visual finish layer and a secondary light block, but it should not be the primary control. Drapery alone rarely achieves the light seal that a properly installed roller shade provides.
For rooms where window treatment alone is not sufficient (south-facing windows in summer, west-facing rooms in late afternoon), some homeowners add a secondary interior partition or alcove to increase the distance between the window and the viewing area. This is a significant architectural intervention, appropriate for a dedicated theater build rather than a media room conversion.
Smart Lighting Integration
The question of which control system to use is one of the most common lighting questions in home theater planning. The answer depends on the level of integration you need and the other systems in the home.
Consumer smart lighting (the HomeKit, Google Home, and similar ecosystems) handles basic dimming scenes and responds to voice commands. For a media room where you want dim lights and a good display, this level of control is functional. The limitations are latency (a scene trigger may take a few seconds to execute across devices), reliability (these systems depend on cloud connectivity for some functions), and depth of integration with the AV system.
Lutron Caseta is the entry point for dedicated lighting control. It operates on its own radio protocol, which means it is not dependent on a Wi-Fi router or cloud service. Scenes execute reliably and almost instantaneously. It integrates directly with most AV control systems. For most residential home theaters in the $50,000 to $150,000 build range, Caseta covers the lighting control needs at a reasonable cost.
Lutron RadioRA 3 and Homeworks QS are whole-home lighting control systems appropriate for larger homes or installations where the theater lighting is part of a broader lighting design that covers the entire house. These systems require a licensed Lutron dealer for installation and programming. They integrate with Control4 and other full home automation platforms.
Control4 and similar whole-home automation platforms bring the lighting, audio, video, HVAC, and shade control under a single interface. In a Bay Area home where the theater is one room in a larger automation project, this makes sense. As a standalone lighting solution for a single room, it is more than necessary.
The right choice is the simplest system that meets your control requirements. For most Bay Area homeowners building a media room or dedicated theater, Lutron Caseta provides the reliability, scene control, and AV integration without requiring a full home automation project.
LED Strip Placement Beyond Bias Lighting
LED strip lighting appears in home theater design in several places beyond the back of the screen. Used well, it adds depth and a deliberate finish to the room. Used poorly, it looks like an afterthought from a consumer electronics store.
Cove lighting along the ceiling perimeter, with the strip pointed upward to wash the ceiling, creates indirect ambient light that works well for an intermission scene. The ceiling becomes a soft, diffuse light source rather than having the light originate from a visible fixture.
Under-seat lighting serves a similar function to aisle lighting but is mounted beneath the chair or sofa base rather than on the wall. It creates a floating effect for the furniture and marks the seating positions in a dark room.
Cabinet and millwork lighting behind acoustically transparent front panels, inside AV rack enclosures, or beneath display consoles adds a finished appearance. This is typically low-output accent lighting rather than a functional light source.
All of these applications should use dimmable LED strip on dedicated circuits that participate in the room's lighting scenes. Strip lighting that cannot be dimmed and is not part of the scene control defeats the purpose.
Putting the Lighting Plan Together
A home theater lighting design is not a shopping list. It is a plan that specifies circuits, fixture types, color temperatures, mounting positions, and scene programming before anything is installed. Changes after installation are expensive.
The sequence is: room dimensions and architecture first, then window treatment, then fixture placement, then scene programming. Window treatment decisions affect where ceiling fixtures can be located (motorized shade pockets take up ceiling space near windows). Fixture placement affects what circuits are needed. Scene programming is meaningless without knowing what circuits exist.
If your theater project involves a contractor or AV integrator, the lighting plan should be part of the initial design scope, not an afterthought. The home theater design guide covers the broader design layer of which lighting is one part. For Bay Area-specific considerations, including older electrical panels that may need upgrading for a dedicated dimming circuit, the Bay Area home theater design guide covers the electrical and permitting context.
For a room that also needs acoustic treatment, the decisions interact: panels on the side walls affect where wall sconces or aisle lighting can be mounted, and the ceiling treatment affects cove lighting feasibility. The home theater design ideas guide shows how lighting fits into the full aesthetic picture across different room styles and approaches. For the full one-touch scene setup that ties lighting into your AV system, the smart home integration guide covers Lutron, Control4, and HomeKit scene programming in depth.
Bay Area homeowners ready to move from design to installation can find AV integrators who specialize in lighting integration and dedicated theater builds at Bay Area AV Pros. The full guide collection for Bay Area home cinema planning is at Bay Area Home Cinema.
Frequently Asked Questions
What color temperature should bias lighting be for a home theater?
Bias lighting should be 6500K (D65), which matches the white point calibration standard used for cinema displays. Warmer temperatures like 3000K shift how your eyes perceive color on screen. Most dedicated bias lighting strips are sold at D65; standard warm LED strips are not a substitute.
How do you control light in a Bay Area home theater with large windows?
The most effective solution is a layered approach: blackout roller shades as the primary block, followed by drapery panels or recessed pocket treatments for aesthetics when the shades are raised. Motorized blackout shades that integrate with your lighting control system let you trigger a single scene that dims the lights and closes the shades simultaneously. Bay Area homes with east- or west-facing windows can see significant afternoon light intrusion, so motorized shades tied to the home automation system are worth budgeting for.
What is the difference between step lighting and aisle lighting in a home theater?
Step lighting illuminates the riser faces in tiered seating arrangements, preventing trips when the room is dark. Aisle lighting runs along the base of the side walls or under seat bases to mark pathways. Both serve a safety function during viewing. In practice, most residential home theaters use one or the other rather than both, depending on whether the room has a raised seating tier.
Can you use smart home lighting (HomeKit, Google Home) for a home theater?
Consumer smart lighting platforms can handle basic dimming scenes and respond to voice commands. Their limitation is latency and reliability during movie starts. A dedicated lighting control system (Lutron Caseta, Lutron RadioRA, or a full Control4 integration) offers faster response, better reliability, and deeper integration with the AV system so the projector on/off trigger can automatically run the lighting scene. For a media room, consumer smart lighting is adequate. For a dedicated home theater where you want a single button to run the whole experience, a dedicated control system is worth the additional cost.
How bright should home theater lighting be during a film?
During viewing, ambient lighting in a dedicated home theater should be near zero — close to total darkness except for bias lighting behind the screen and any safety lighting at floor level. Bias lighting itself should measure around 10% of the screen's peak white brightness. Overhead fixtures should be fully off, not dimmed to a low level, since even a small amount of overhead ambient light reduces perceived image contrast.