Small Home Theater Room Design: What Actually Works Under 200 Square Feet
Most Bay Area homes were built before the concept of a dedicated cinema room existed. The available rooms are what they are: a spare bedroom that runs 11 by 12 feet, a converted office slightly wider than a hallway, a den that once served as a formal dining room. If you're designing around 150 to 200 square feet, you're working with the same constraints that every Victorian, Craftsman, and ranch-home owner in the region faces.
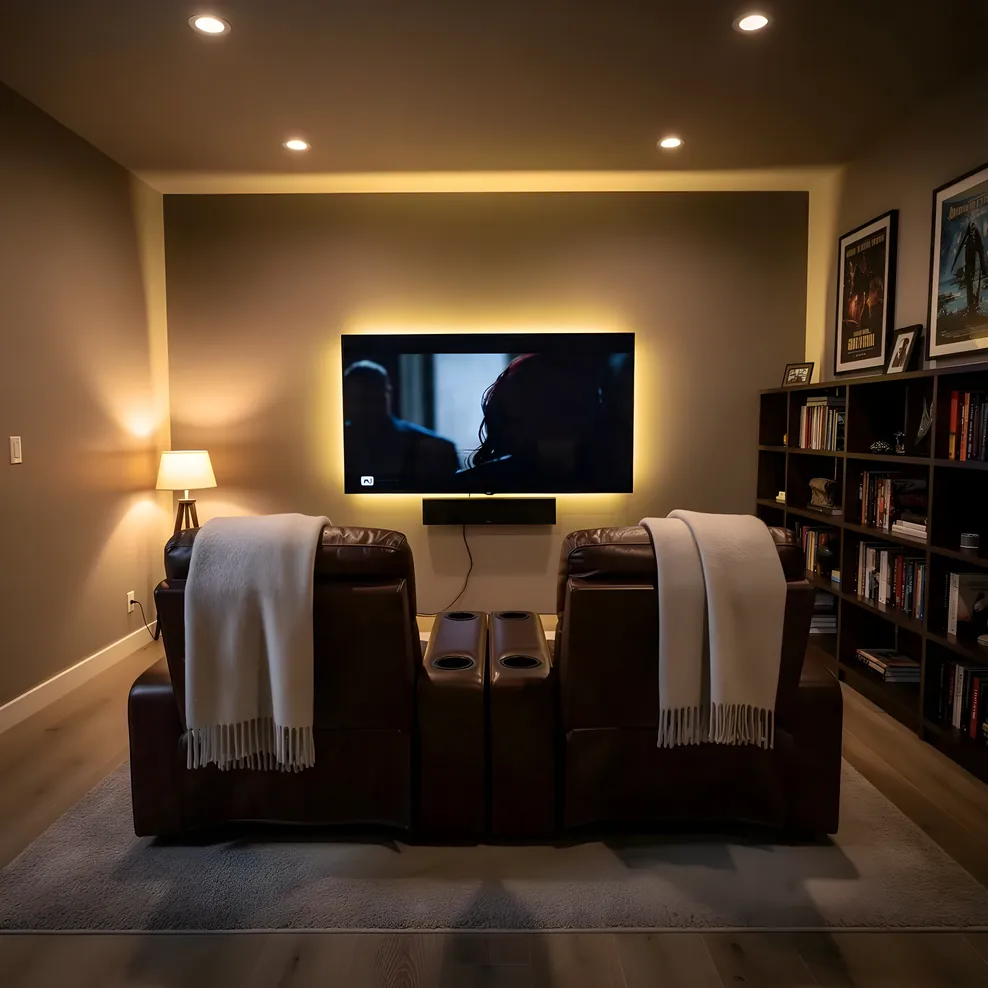
The good news is that a small room is not a failed theater. It's a different theater, one with its own acoustic character, seating geometry, and display requirements. Understanding those differences is what separates a room that delivers an immersive private cinema experience from one that just has a big TV and some bass problems.
This guide covers every meaningful design decision for rooms under 200 square feet: screen size and display type, speaker placement in tight volumes, seating for two to four people, and acoustic treatment approaches that work without gutting the walls.
Screen Size in a Small Room: Closer Is Not Always Bigger
The standard advice to "get the biggest screen you can" does not apply when your viewing distance is constrained. In a small home theater room, you may be sitting 8 to 11 feet from the screen rather than the 12 to 16 feet typical in a full-size dedicated room. At closer distances, a screen that's too wide creates an uncomfortable viewing angle where your eyes have to track too far to follow action at the edges of the frame.
The practical ceiling for most small rooms is a 100 to 110-inch diagonal screen. At an 8-foot viewing distance, a 100-inch screen fills approximately 40 degrees of your horizontal field of view, which is near the upper boundary of comfortable cinema immersion. Push to 120 inches and you've crossed into straining territory for a single row of seating at close range.
For rooms under 150 square feet where your seating row may land at 7 to 8 feet from the screen, a 90-inch display often delivers a better experience than a larger one. The image feels large and enveloping without the physical discomfort of constantly repositioning your focus.
The relevant design standard here is the Society of Motion Picture and Television Engineers (SMPTE) guideline, which recommends a minimum viewing angle of 30 degrees. For a 100-inch 16:9 screen, that puts your ideal front row at roughly 9.5 feet. Most small Bay Area rooms can meet that target.
Projector or Display Panel: Throw Distance Is the Deciding Factor
In a small room, throw distance determines whether a projector is viable. A traditional long-throw projector needs 10 to 14 feet of distance from lens to screen to produce a 100-inch image. In a room that's only 12 feet deep and already occupied by a seating row, there's simply nowhere to put it.
Short-throw projectors change this equation. A short-throw model with a throw ratio around 0.5 can project a 100-inch image from roughly 4 feet. Ultra-short-throw (UST) projectors sit 12 to 18 inches from the screen surface and require virtually no clear sightline between lens and screen, making them well-suited to rooms where someone might walk through the projection path.
The tradeoff with short and ultra-short-throw projectors is brightness and placement flexibility. UST projectors require a flat surface below the screen for the unit to sit on, and they are sensitive to ambient light from above. If your small room has a window you cannot fully control, a UST projector may wash out during daytime viewing.
Large-format display panels (85 to 98 inches) are the other path. They require no throw distance, perform in ambient light, and are straightforward to mount on any wall that can handle the weight. For rooms where throw distance is prohibitive and light control is imperfect, a large OLED or QLED panel often outperforms a projector in practical daily use.
The home theater design guide covers projector types and display formats in more depth if you're still deciding which direction fits your room.
Speaker Placement in Tight Spaces
Sound design in a small room requires acknowledging two realities. First, bass builds up in small volumes. Second, surround speaker placement is physically constrained in ways that don't affect larger rooms.
For the front soundstage, the principles are the same regardless of room size. Left, center, and right speakers should form an arc at roughly ear height from your primary listening position. In practice, this means your left and right speakers may end up placed closer to the screen wall than ideal, resulting in a narrower stereo spread. Angling them slightly inward toward the listening position (toe-in) compensates for this narrowing and maintains soundstage width.
Subwoofer placement is where small rooms differ most from larger ones. Bass frequencies are non-directional, which means the subwoofer can go almost anywhere without affecting perceived localization. However, corner placement in a small room dramatically amplifies low-end output, often to the point of producing a boomy, one-note quality rather than clean, articulate bass. Starting with the subwoofer along the front wall, offset from the corner by 2 to 3 feet, gives you a more controlled starting point before room correction processing takes over.
Dolby Atmos, the object-based surround format that adds height channels for overhead audio effects, is achievable in a small room, but it requires realistic expectations. True ceiling speaker installation in a room with plaster ceilings (common in Bay Area homes built before 1960) is a significant construction project. Atmos-enabled upward-firing modules placed on top of your left and right speakers are a practical alternative that captures the height effect without ceiling work. The results are not identical to dedicated ceiling speakers, but they're meaningful, and they don't require a contractor.
The home theater acoustics guide goes deeper on subwoofer positioning and bass management settings if room modes are a concern in your space.
Seating for Two to Four People Without Burning the Layout
In a room under 200 square feet, you're typically working with one seating row. Two dedicated theater recliners or a three-seat recliner sofa, placed at the correct viewing distance, fills the available depth without leaving enough space for a second raised row. Risers, which add a platform for a second row to see over the first, require at least 14 feet of room depth to work properly. Most small rooms don't have it.
Accept this constraint early and design for one great row rather than two compromised ones. A pair of theater recliners with a center console, or a purpose-built three-seat recliner sofa, gives you comfortable seating for two to four people without stacking the room. These configurations sit against the back wall or 12 to 18 inches off it, allowing the rear surround speakers to be wall-mounted at height above and behind the listening position.
Row depth from screen to the front edge of your seating matters for sightlines, speaker placement, and the overall sense of scale in the room. For a single row at 9 to 11 feet from a 100-inch screen, the room geometry works out naturally in most small spaces. You don't need to force the math.
The home theater seating guide covers recliner configurations, row spacing, and how to measure your specific room for seating depth.
Acoustic Treatment in Small Volumes
Small rooms have an acoustic signature that differs from large ones in one important way: they have more surface interaction per cubic foot of air. Sound bounces off the walls, floor, and ceiling with less time to decay between reflections, which creates a sense of blurring or smearing in the audio. Treatment addresses this, but the approach for a small room is different from covering a large basement.
Bass traps belong in the corners, particularly the floor-to-ceiling corners behind the listening position and at the front corners flanking the screen wall. These absorptive panels address low-frequency buildup, the most common acoustic problem in small cinema rooms. Two-foot floor-to-ceiling bass traps at all four vertical corners make the largest single improvement available to a small room before any other treatment is applied.
Mid-frequency absorption goes on the first-reflection points: the side walls at the point where sound from the front speakers bounces toward the listening position, and the ceiling at the same lateral point. A simple test is to sit in your primary listening position and have someone slide a mirror along the side wall. Where you can see either front speaker in the mirror is the first-reflection point. Covering those areas with 2-inch acoustic panels reduces early reflections and sharpens the soundstage.
Diffusion on the rear wall, the wall behind the listening position, prevents the sense of sound "closing in" from behind. Diffusion panels scatter rather than absorb sound, preserving room ambiance while breaking up discrete reflections. In a small room, diffusion behind the listening position pairs well with absorption on the side walls to create a mixed treatment that stays acoustically alive without being clinical.
The floor and ceiling are often underaddressed. A room with hard flooring and an untreated ceiling is an acoustically live space that fights your audio investment. A high-pile area rug under the seating row addresses floor reflections without permanent construction. Ceiling treatment above the listening position, either cloud panels suspended from the ceiling or direct-mount absorption, addresses the vertical axis that side-wall panels can't reach.
Light Control in Bay Area Homes
Bay Area homes, particularly the Craftsman and Victorian stock that dominates the East Bay and San Francisco, tend to have windows placed for natural light rather than light control. Converting a spare bedroom into a cinema room often means addressing a window or two that cannot be moved.
Blackout roller shades are the minimum effective treatment. They install inside the window frame, retract completely when not in use, and provide near-complete light blocking when deployed. For rooms with multiple windows or a window positioned directly behind the screen, motorized blackout shades controlled by the room's automation system allow you to dim the room as part of a "movie mode" scene without getting up.
Rooms that face west or south in particular collect afternoon and evening light at exactly the hours most people are watching films. A room that's dark at 9 AM may be compromised by 4 PM without proper shade treatment.
The Bay Area home theater planning guide covers permitting, electrical requirements, and light control options specific to older housing stock in the region.
Frequently Asked Questions
What is the minimum room size for a small home theater?
A functional single-row home theater can fit in a room as small as 10 by 12 feet (120 square feet). At this size, you are limited to a 90 to 100-inch screen with a short-throw or ultra-short-throw projector, one row of two to three seats, and basic acoustic treatment. Rooms in the 140 to 180 square foot range offer more design flexibility, including room for proper bass trap placement and a wider seating row.
What screen size should I use in a 12 by 12 room?
In a 12 by 12 foot room, your seating row typically lands at 8 to 9 feet from the screen wall. At that distance, a 90 to 100-inch diagonal screen delivers a comfortable viewing angle. A 120-inch screen at 8 feet creates eye strain from edge-to-edge tracking. The SMPTE standard recommends a minimum 30-degree horizontal viewing angle, and a 100-inch 16:9 screen achieves that at approximately 9.5 feet.
Can you do Dolby Atmos in a small home theater?
Yes, but with adjustments. In-ceiling speaker installation for Atmos height channels requires opening a drywall or plaster ceiling, which is a significant project in older Bay Area homes. A practical alternative is Atmos-enabled upward-firing speaker modules placed on top of your left and right speakers. These bounce height effects off the ceiling and are processed by your receiver to simulate overhead audio. The results are less precise than dedicated ceiling speakers but meaningful enough for most listeners in a small room.
How do I reduce bass buildup in a small theater room?
Start with subwoofer placement: avoid corners, which amplify bass to an unnatural degree. Place the subwoofer along the front wall, 2 to 3 feet from the corner. Then add floor-to-ceiling bass traps in the vertical corners of the room, particularly behind the listening position. Finally, use the bass management settings in your AV receiver to set a crossover frequency that hands off low-end duties to the subwoofer smoothly. Room correction software included with most modern receivers can also compensate electronically for remaining room modes.
Do I need a projector or can I use a TV in a small home theater room?
Both work; the right choice depends on your room's depth and light control. If you have fewer than 10 feet between the projector mounting position and the screen, you need a short-throw or ultra-short-throw projector, which costs more than equivalent long-throw models. If your room has a window you cannot fully black out, a large display panel (85 to 98 inches) performs more reliably in ambient light than any projector. For rooms with strong light control and adequate throw distance, a projector delivers a larger image at lower cost than an equivalent display panel.
How many seats fit in a small home theater room?
Most small rooms under 200 square feet accommodate one seating row of two to four people comfortably. Two dedicated theater recliners or a three-seat recliner sofa are the most common configurations. A second raised row on a platform (riser) requires at least 14 feet of room depth to maintain proper sightlines, which is more than most small rooms provide. Designing one excellent row rather than two compromised ones is the right approach for the majority of sub-200 square foot spaces.
Planning Your Small Home Cinema
A small room does not require compromises on the things that matter most to the experience: image quality, audio clarity, and the sense of immersion that makes a private cinema different from a living room with a large TV. It does require a clear-eyed view of what is physically possible within the space.
The sequence that produces the best results is to measure first, choose display type second, then specify speakers and acoustic treatment to match the room's actual geometry. Most homeowners do this in reverse, buying equipment and then discovering that the throw distance is wrong, the seating row is too close, or the bass treatment is insufficient.
If you're still working through the planning phase, the full home theater design guide is the starting point for understanding room requirements across all dimensions, from dimensions and layouts to cost ranges for Bay Area projects. The complete guide collection is at Bay Area Home Cinema.