Home Theater in Older Bay Area Homes
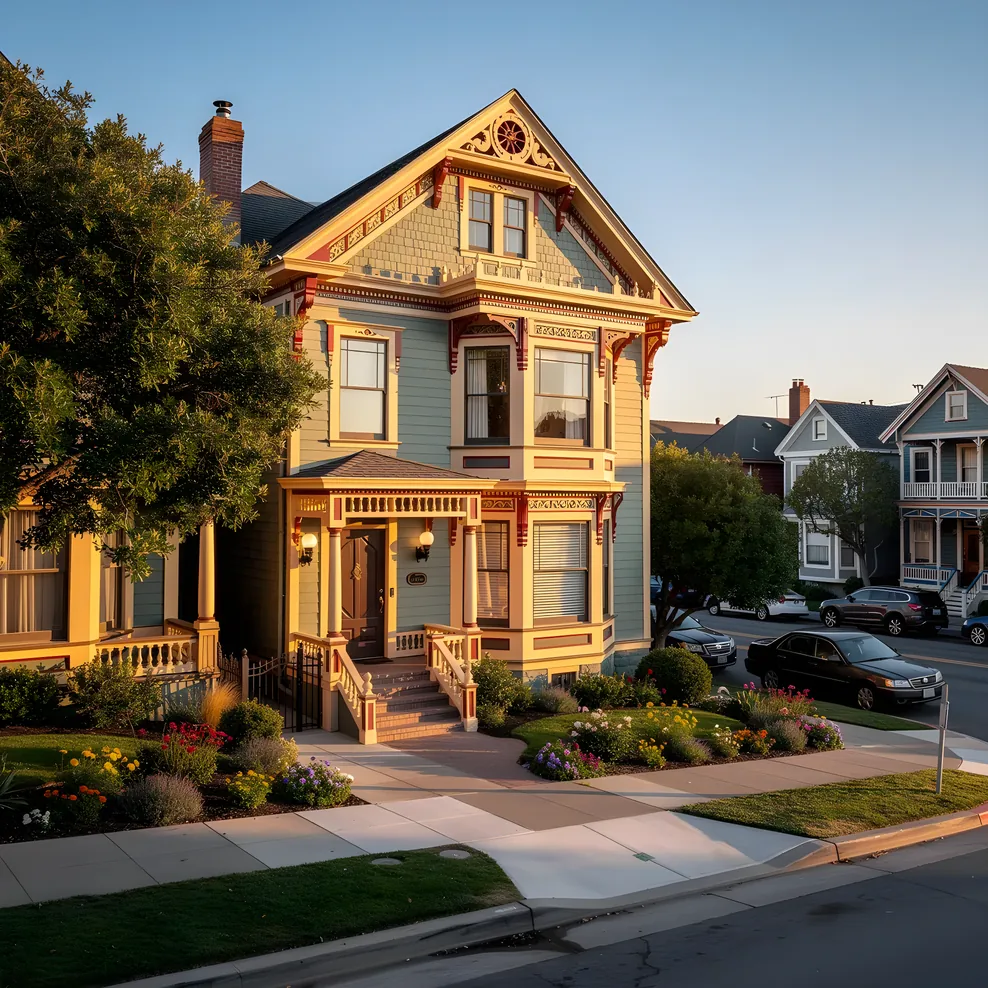
Most Bay Area homeowners planning a home theater face a problem that doesn't come up in national planning guides: their house was built before any of the assumptions those guides make. No finished basement, no drywall, no 200-amp panel, no room specifically designed to hold a projector and five speakers. A Victorian in Oakland. A Craftsman bungalow in Berkeley. A mid-century ranch in San Jose. These are the homes where most Bay Area home cinema projects actually happen, and they present a specific set of challenges that reward careful planning.
This guide covers those challenges directly. Plaster and lath construction, knob-and-tube wiring, electrical capacity, narrow rooms, low ceilings, architectural character worth preserving, and what California's historic district rules actually mean for interior work.
Plaster Walls and Lath: What You're Actually Working With
The single most common surprise for Bay Area homeowners doing a theater renovation in a pre-1940s home is the wall construction. Modern homes use 1/2-inch drywall over wood or metal studs. Victorian and Craftsman homes use three-coat plaster over wood lath: a base coat, a brown coat, and a finish coat, applied wet and built up to roughly 7/8 of an inch of dense, hard material over strips of wood lath nailed horizontally across the studs.
That construction has acoustic properties worth keeping. Plaster walls are denser and more massive than drywall, which means they do a better job of containing low-frequency sound. A subwoofer in a plaster-walled room transmits less structure-borne bass to adjacent rooms than the same subwoofer in a drywall room with equivalent wall thickness. For a private cinema concerned about sound bleed to bedrooms or neighbors, that mass is genuinely useful.
The challenges are mounting and wire routing.
Mounting a TV or projector screen on plaster requires a different approach than drywall anchors. Standard toggle bolts and hollow-wall anchors rely on the backing material to grip. Plaster over lath often fractures around anchor points if the load is significant, and the lath strips behind it add complexity because they run horizontally, not vertically. The reliable approaches for heavier mounts are:
Locate a stud behind the plaster using a deep-scan stud finder, then drive a long wood screw or lag bolt through the plaster and lath and into the stud. This is the strongest attachment point and the right method for projector mounts on the ceiling, where failure is not an option.
Use a French cleat system, which distributes the load across several lath strips rather than concentrating it at one anchor point. French cleats work well for acoustic panels and for fixed-frame projection screens.
For very heavy items or where stud location is uncertain, have a licensed contractor install blocking between joists or studs, patch the plaster, and then mount into the blocking. It's more work upfront, but it eliminates the risk of plaster cracking or anchors pulling through under load.
Routing wire through plaster walls is more constrained than drywall because you cannot cut a channel, drop wire, and patch it cleanly. The practical paths for in-wall wire runs are vertical drops between studs, accessed through small openings above baseboards or through the floor from below. Horizontal runs are more difficult because lath strips block the path and require cutting more material. For most installations in older Bay Area homes, the cleaner solution is surface-mounted wire management: paintable cable channels along baseboards and up walls to wall plates, finished to match the existing trim. Done carefully, this is nearly invisible and avoids damaging original plaster.
Knob-and-Tube Wiring: The Electrical Question You Need to Answer First
Knob-and-tube wiring was standard in Bay Area homes built through the early 1940s. It consists of single-conductor copper wires routed through ceramic knobs nailed to framing and through ceramic tubes where the wire passes through wood. It has no ground conductor. It relies on air cooling around the wires rather than insulation.
Many Bay Area homes have had their knob-and-tube wiring partially or fully replaced in decades of updates. Some have not. If you are unsure what your home has, the answer matters a great deal before committing to a theater project.
Original knob-and-tube wiring cannot be extended to add new circuits. It cannot be covered with insulation, which matters in any theater room requiring soundproofing or climate control. It cannot feed grounded receptacles, and essentially all modern AV equipment requires a grounded outlet. Any licensed electrician doing permitted work will not connect to active knob-and-tube and will flag it for replacement.
If your home has active knob-and-tube circuits in the room you are planning to use for a theater, the first step is not specifying a projector or speaker system. It is getting an electrician to assess which circuits are affected and what a partial or full replacement would cost. This is not a discretionary item.
Limited Electrical Capacity: Panel Assessment Before Equipment Planning
Even homes that have had knob-and-tube wiring replaced often have 100-amp main panels. That was adequate for a house in the 1960s. It is frequently not adequate for a house that now has central air, a dishwasher, an electric range, and potentially an EV charger, plus a theater room pulling 2,000 to 3,500 watts when the system is running.
A dedicated home cinema needs, at minimum, two separate 20-amp circuits: one for the AV equipment and amplification, one for the projector and lighting. Larger systems with multiple power amplifiers warrant a third. Running those circuits back to a 100-amp panel may be feasible if the existing house load is modest, or it may require a panel upgrade. Only a load calculation by a licensed electrician can tell you which.
Panel upgrades to 200-amp service in the Bay Area typically run between $3,000 and $6,000, including the electrician's labor, permit, and utility coordination. That cost belongs in your theater budget from the beginning. The home theater electrical panel guide walks through how to assess your panel's current capacity and what the upgrade process involves.
What surprises many homeowners is that electrical work requires both a permit and a licensed electrician in every Bay Area jurisdiction. There is no DIY path for adding circuits to a panel. Budget accordingly, and factor the permit timeline into your project schedule.
Narrow Rooms and Low Ceilings: Working Within the Footprint
Victorian and Craftsman floor plans were not designed for cinema. San Francisco row houses routinely run 25 feet wide, with rooms that follow suit. A 10- or 11-foot-wide room is a genuine constraint for a home theater, where the screen width, speaker placement, and side-wall clearance for acoustic treatment all compete for the same feet.
The math for screen size in a narrow room starts with the seats. A viewer should ideally sit at a distance of roughly 1.5 times the diagonal of the screen. That means a 90-inch screen wants viewers about 11 feet back. In a room that is 14 feet deep with a screen wall at one end, 11 feet of viewing distance leaves 3 feet behind the screen for HVAC, equipment, and acoustic treatment. That is workable, though tight.
Screen width in a narrow room matters as much as screen size. A 90-inch 16:9 screen is 78 inches wide. In an 11-foot (132-inch) room, that leaves 27 inches on each side: enough to mount side-channel speakers, enough for acoustic panels, but not enough for seating that is not on the centerline. Anyone sitting significantly off-center in a room this width will have compromised sightlines.
Projector choice matters more in small rooms. A standard-throw projector at a 1.8:1 throw ratio needs 12 feet of distance to fill a 90-inch screen. In a 14-foot-deep room, the projector would need to sit 12 feet from the screen, which puts it at or behind the primary seating position. A short-throw projector at a 0.8:1 ratio fills the same screen from 5 feet, solving the geometry entirely. Short-throw models cost more at equivalent quality levels, but in constrained Bay Area rooms they often represent the better overall value once you account for what they make possible.
Ceiling height of 8 feet is common in Craftsman homes and in some Victorian secondary rooms. That height is workable but eliminates in-ceiling speaker placement for overhead audio formats like Dolby Atmos, which require speakers angled downward from above the listening position. At 8 feet, a projector mounted to the ceiling also sits uncomfortably close to the beam path unless the projector has significant lens shift. Nine-foot ceilings open up both options considerably. If your room choice is flexible, ceiling height is a meaningful variable.
Preserving Architectural Character
A theater room in a Victorian or Craftsman home does not have to look like a generic black-box cinema. The homes that handle this design challenge well are the ones that start from the existing character of the room rather than trying to override it.
Original moldings, built-in cabinetry, hardwood floors, and period-appropriate hardware are assets, not obstacles. Deep-toned wall treatments in forest green, navy, charcoal, or burgundy read as intentional in a room with original millwork. Fabric-wrapped acoustic panels can be made to double as art pieces and can be covered in materials that reference the home's era. Equipment storage can be designed as built-in cabinetry that matches the existing style rather than as a black equipment rack sitting in a corner.
The acoustic requirements of a theater room and the aesthetic character of an older home are not in conflict. Both reward covering first-reflection points on the side walls, which can be done with panels that look like framed textile art. Both benefit from area rugs over hardwood floors, which are standard in period-appropriate interiors anyway. The difference between a theater room that feels like it belongs in a Victorian and one that looks grafted on is usually a matter of material selection and custom millwork rather than structural change.
For mid-century homes, which have their own design vocabulary of open plans, natural materials, and clean geometry, the approach shifts. A media room in an Eichler or a 1960s ranch that uses concealed equipment, acoustically transparent linen panels over speaker areas, and furniture that reads as living room rather than dedicated theater tends to work well. The architectural language of the home guides the finish treatment.
Historic Districts and Renovation Permits
Many of the Bay Area's most desirable older neighborhoods fall within designated historic districts: parts of San Francisco, Berkeley, Alameda, Oakland's Piedmont Avenue corridor, and other areas with significant pre-1940s housing stock. Homeowners in these districts sometimes assume that any interior work triggers historic preservation review. That is usually not the case.
Historic district rules typically govern what is visible from the public right of way: exterior alterations to facades, windows, doors, rooflines, and materials. Interior work, including adding a home theater in an existing room, is generally not subject to historic design review because it does not affect the character of the building as seen from the street.
The exception is structural or electrical work that requires a building permit. Once a permit is pulled, a building inspector may visit the property, and any visible exterior alteration that is part of the permitted scope can trigger historic review. For a home theater project that is entirely interior and requires only electrical permits, this is unlikely to be an issue. For a garage conversion or an addition that changes the building's exterior appearance, it almost certainly is.
The practical advice: confirm your jurisdiction's rules before starting any permitted work in a historic district area. San Francisco's Historic Preservation Commission and Berkeley's Landmarks Preservation Commission both have staff who can answer specific questions about what requires their review. Getting that answer before starting saves rework.
Frequently Asked Questions
Can you mount a TV or projector screen on plaster walls?
Yes, but not with standard drywall anchors. Plaster over wood lath requires either locating and screwing into lath strips, using a French cleat system that distributes load across multiple lath strips, or building a floor-supported mounting frame that leans against the wall rather than anchoring into the plaster. For a projector mount on a plaster ceiling, the anchor must go into the ceiling joist itself, not the plaster. A stud finder set to deep-scan mode will locate joists through plaster. If you cannot confirm joist location, a licensed contractor can open a small access area, install blocking between joists, and patch the plaster.
Is knob-and-tube wiring safe for a home theater?
Original knob-and-tube wiring should not be extended, loaded with additional outlets, or covered with insulation. If your home still has active knob-and-tube circuits, those circuits need to be replaced by a licensed electrician before any theater electrical work can proceed. The wiring itself is not inherently dangerous in its original condition, but it was designed for much lower loads than modern electronics require, and it cannot be connected to grounded receptacles that AV equipment expects. Any electrician doing permitted work in a Bay Area jurisdiction will flag active knob-and-tube and will not be able to add circuits off it.
How do you run speaker wire and HDMI in a home with plaster walls?
Running wire through plaster-and-lath walls is more involved than drywall because you cannot cut channels and patch them the same way. The standard approaches are surface-mount conduit or wire molding finished to match the room's trim, running wire through the floor cavity from below if the room sits over a crawlspace, or fishing wire vertically through wall cavities between studs with a flexible drill bit. HDMI runs are usually routed along baseboards in paintable wire channels or concealed in millwork. Horizontal runs are harder, because lath strips typically block horizontal paths that are straightforward in drywall.
How do you handle acoustics in a room with original hardwood floors?
Original hardwood floors are highly reflective surfaces that create flutter echo between the floor and ceiling. The most effective approach for homeowners who want to keep the wood is a large, dense area rug covering the listening zone, ideally with a thick pad underneath. A rug covering roughly two-thirds of the floor area recovers a meaningful fraction of the absorption that carpet would provide. On the side walls, acoustic panels at first-reflection points address the other major source of early reflections. The combination produces a listening environment that is acoustically coherent without carpet and without altering the original floors.
Do you need a permit to add a home theater in a historic Bay Area home?
Installing AV equipment in an existing finished room does not typically require a permit. The threshold is crossed when work becomes structural or electrical: adding dedicated circuits, upgrading the electrical panel, or framing a new wall. For homes in designated historic districts, interior AV work is generally not subject to historic preservation review. The exception is if permitted work triggers a building inspection that also covers visible exterior alterations. For any permitted work in a historic district, confirm requirements with your local building department before starting.
What screen size works in a narrow Victorian or Craftsman room?
Room width is usually the binding constraint. A room that is 11 feet wide can support a screen up to approximately 90 to 96 inches diagonal if you maintain side-wall clearance for speaker placement and acoustic treatment. Pushing a screen larger than the room's width-to-screen ratio allows creates sightline problems for seats near the side walls. For rooms under 11 feet wide, a short-throw projector positioned 6 to 8 feet from the screen can fill a 90-inch screen without the projector crowding the seating area.
Planning Your Next Step
The older your Bay Area home, the more the room itself determines what's possible. A converted bedroom in a 1910 Craftsman will have different constraints from a bonus room in a 1965 ranch, and both will differ from a garage conversion. The design process should start with an honest assessment of what the room actually offers: wall construction, ceiling height, room dimensions, existing electrical service, and the architectural character you want to preserve.
For the full picture of Bay Area-specific considerations across all home types, the Bay Area home theater guide covers electrical, permitting, seismic requirements, and cost in detail. If your project involves electrical work, the home theater electrical panel guide is the right next read. And if you are thinking through room dimensions and how they interact with screen size, the home theater design guides cover the planning math for rooms of all sizes.
For Bay Area specialists with direct experience in Victorian, Craftsman, and mid-century homes, bayareaavpros.com lists vetted AV integrators across the East Bay, South Bay, Peninsula, Marin, and San Francisco. The complete guide collection is at Bay Area Home Cinema.