Home Theater Electrical Requirements: Circuits, Panels, and Wiring
Electrical planning is where home theater projects most often get derailed. The AV equipment gets all the attention, and the electrical infrastructure gets addressed late, after the budget is set and sometimes after walls are already closed. In Bay Area homes, where the median electrical panel predates the remote control, this sequencing problem is especially costly.
The good news is that the electrical requirements for a home theater are well understood, and planning for them upfront is straightforward once you know what you're actually dealing with.
Dedicated Circuits: How Many and What Amperage
A home theater draws real electrical load. A high-performance AV receiver runs 600 to 1,000 watts under load. A projector adds another 300 to 500 watts. Separate power amplifiers, a subwoofer, and any HVAC for a sealed room stack on top of that. The total can reach 2,500 to 4,000 watts for a substantial setup.
Dedicated circuits are standard practice because they accomplish two things: they prevent the theater from tripping breakers shared with other household loads, and they eliminate electrical noise introduced by appliances like refrigerators, HVAC compressors, and dimmers that share the same circuit.
Most dedicated home theater rooms are served by two 20-amp circuits at minimum: one for the AV equipment stack and one for lighting and miscellaneous outlets. If your design includes separate monoblock amplifiers or a high-draw subwoofer amplifier, a third 20-amp circuit is worth planning. Some installations use a 30-amp circuit for the main equipment run, though 20-amp circuits with a proper power management unit typically handle most setups without issue.
The circuits should run directly from the main panel to the theater room. Sharing a circuit with adjacent rooms, even on a separate breaker, introduces the noise and interference you're trying to avoid.
Panel Capacity: What to Assess Before You Budget
This is where Bay Area homeowners hit a constraint that national home theater guides rarely address. A significant share of homes built before 1970 in the Bay Area still have 100-amp main panels. That was adequate for a mid-century household. It's often not adequate for a modern home with central air conditioning, an EV charger, induction cooking, and a home theater added on top.
A 100-amp panel with available breaker space can sometimes accommodate a theater room's two dedicated circuits without an upgrade, depending on what else the house is running. A full load calculation tells you whether you have headroom. If the panel is already crowded or near capacity, a 200-amp service upgrade is the right answer before the theater buildout begins.
Panel upgrades in the Bay Area run $3,500 to $6,500 for a straightforward replacement, once you factor in licensed electrician rates, the permit, and the PG&E coordination required for service upgrades. That number includes the required inspection. If your home has aluminum branch wiring, which appears in some Bay Area homes built in the 1960s and early 1970s, that's a separate conversation with your electrician about remediation options.
The right time to assess panel capacity is before you finalize your theater budget, not after you've committed to equipment. An unexpected panel upgrade can shift a project's cost meaningfully.
Clean Power: Isolated Ground and Power Conditioning
Electrical noise on the power line shows up in home theater systems as hum, buzz, or interference in the audio. Dedicated circuits significantly reduce this, but two additional tools address it more precisely.
An isolated ground (IG) outlet keeps the grounding path for AV equipment separate from the general building ground, reducing noise pickup from other circuits. These are identifiable by their orange color, and they require specific wiring from the panel. High-sensitivity audio setups and rooms with long signal runs between components benefit most from IG outlets. In a typical home cinema build, putting IG outlets at the AV rack position is sufficient.
Power conditioners filter line noise and protect equipment from voltage irregularities. They don't provide battery backup, but they do provide a clean, consistent voltage supply to the equipment. A quality power management unit at the rack handles both power conditioning and sequenced turn-on of components, which protects equipment by preventing inrush current surges when everything powers on at once.
UPS and Battery Backup for Projectors
Projectors, whether lamp-based or lamp-free, benefit from proper cool-down after use. Lamp projectors in particular rely on their cooling fans running after the lamp shuts off. A sudden power cut, whether from a tripped breaker, an outage, or someone hitting the wrong switch, interrupts that cycle and shortens lamp life significantly.
A UPS placed on the projector circuit provides enough battery runtime for a clean shutdown sequence. The sizing target is 1,000 to 1,500 VA for most projector draws, which gives five to ten minutes of runtime after power loss. You're not trying to keep the movie running through an outage. You're giving the projector time to complete its cooling cycle.
AV equipment racks often include a UPS for the core components as well, primarily to protect against short outages and voltage drops rather than extended backup. In areas of the Bay Area with older distribution infrastructure, particularly parts of the East Bay and Peninsula, brief power fluctuations are common enough that this protection is worth the cost.
Low-Voltage Wiring: What to Run Before Walls Close
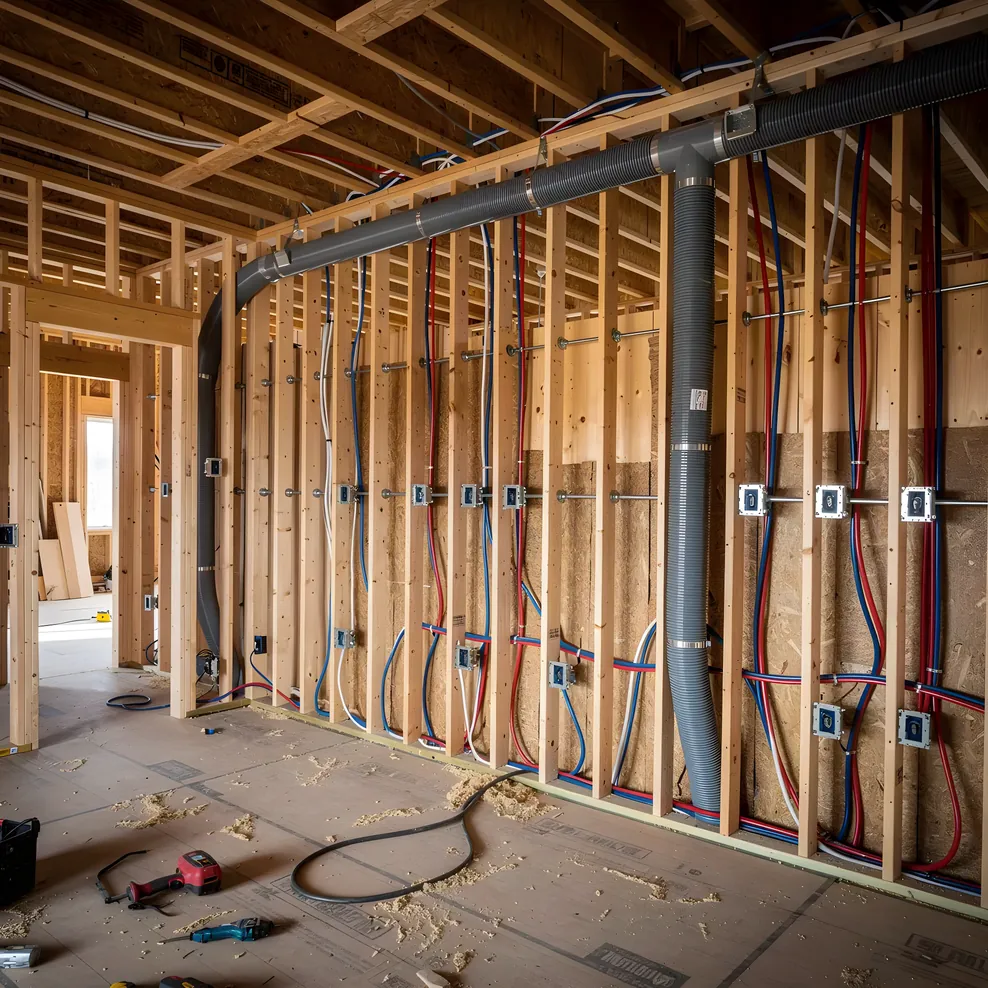
Low-voltage wiring is the category that gets cut in early project planning and causes the most pain later. Speaker wire, HDMI, network cable, and control system wiring all need to be run before walls are finished. Retrofitting any of them after the fact means opening walls.
For a dedicated home cinema, the in-wall wiring runs to plan for include:
Speaker wire from each speaker location to the AV rack. Run 12 AWG or 14 AWG in-wall rated cable to every speaker position, including ceiling speakers for overhead audio channels. Label both ends at rough-in so the installer doesn't have to trace wires later.
HDMI runs from the projector mount position to the equipment rack. Run a conduit sleeve here rather than just cable, because HDMI standards change and conduit lets you pull new cable as needed without reopening the wall. A 1-inch EMT conduit from the projector ceiling box to the rack position is the standard approach.
Cat6 cable from the rack location to the room's network infrastructure. Two runs at minimum, one for primary network connectivity and one for a dedicated control network or future use. Pull a third if your design includes IP-addressable speakers or in-ceiling speakers with local processing.
Control wiring for lighting, shades, or a dedicated room control system if you're including one. Plan this before walls close because running control cable through conduit with signal cable creates noise issues.
Conduit vs. In-Wall Runs
The choice between pulling cable through conduit and running direct in-wall cable is about future-proofing versus cost. Direct in-wall cable installs faster and costs less upfront. Conduit costs more to install but makes cable replacement straightforward.
The practical recommendation for a home theater build: use conduit for the projector-to-rack HDMI run and for any long runs where future cable replacement is predictable. Run speaker wire and Cat6 direct in-wall, with enough slack at termination points to reterminate if needed. Conduit everywhere is expensive and usually not necessary.
In walls with plaster and lath construction, which is common in older Bay Area homes, direct-pull cable runs are significantly harder than in drywall. The combination of narrow stud cavities, fire blocking, and plaster materials makes fishing wire without a finished entry point difficult. If you're retrofitting a theater into an existing room with plaster walls, budget for a licensed AV installer who has experience with this type of construction.
Outlet Placement Planning
Outlet placement in a home theater room deserves more thought than a standard room because the equipment layout is fixed and running extension cords or visible power strips across a finished theater room defeats the purpose.
Plan outlets at the rack location with enough capacity for the equipment count plus 30 percent for future additions. A double duplex arrangement, four outlets, is a minimum at the rack position. Plan additional outlets at each seating position if you're including USB charging or recliner power bases. Plan an outlet at the projector ceiling position for the projector power feed, even though HDMI and control run to the rack.
Lighting circuits should be on a dimmer-capable run. Specify LED-compatible dimmers at rough-in rather than standard dimmers, as older incandescent dimmers produce audible buzz with LED loads.
Bay Area Specifics: PG&E and Permit Coordination
Electrical work in a home theater requires a permit in virtually every Bay Area jurisdiction once it involves new circuit installation or panel work. The permit process includes a rough-in inspection before walls close and a final inspection after completion. Work done without permits creates issues at resale and can affect homeowner's insurance coverage.
Service upgrades from 100 to 200 amps require PG&E coordination in addition to the city or county permit. PG&E handles the meter and service entrance upgrade on their end, which adds two to four weeks to the timeline in typical cases. Build this into your project schedule.
Licensed electrical contractors in the Bay Area are required for panel work, service upgrades, and circuit installation in permitted projects. AV installers handle low-voltage work, which is a separate license category. The interface between the two trades is at the in-wall rough-in stage, where both need to coordinate before walls close.
For the full picture on what Bay Area home theater projects require from a permitting standpoint, the California home theater permit guide covers what triggers a permit, which trades require licensed contractors, and how county review timelines work.
Planning the Electrical Before Anything Else
The electrical layer of a home theater project needs to be planned before equipment is specified, before the room is budgeted in detail, and before walls are opened. It determines whether your current panel can support the project, what the permit and inspection timeline looks like, and what gets roughed in before walls close.
Starting with electrical is not the glamorous part of the planning process. But getting it right upfront, rather than discovering a panel upgrade is needed midway through a build, is what keeps a theater project on budget.
The Bay Area home theater guide covers the other constraints specific to this region: older housing stock, seismic requirements, permitting, and realistic cost expectations. The home theater design guides address room dimensions, acoustic planning, and how to think about layout before equipment is selected.
For Bay Area homeowners looking to connect with installers who specialize in dedicated theater rooms and understand local construction conditions, bayareaavpros.com lists vetted specialists across the East Bay, South Bay, Peninsula, Marin, and San Francisco.
Frequently Asked Questions
How many dedicated circuits does a home theater need? Most home theaters need at least two dedicated 20-amp circuits: one for the AV equipment stack and one for lighting and general outlets. Larger rooms with separate amplifiers, a high-draw subwoofer, and HVAC in a sealed space often benefit from a third circuit. Running circuits directly from the panel eliminates electrical noise that can affect audio quality.
Do I need to upgrade my electrical panel for a home theater? Not always. A 200-amp panel with available breaker slots can usually accommodate the circuits a theater room needs. A 100-amp panel, common in Bay Area homes built before 1970, may already be near capacity. A licensed electrician's load calculation before you finalize your budget tells you which situation you're in.
What is an isolated ground outlet and does a home theater need one? An isolated ground outlet keeps the equipment's grounding path separate from the building's general ground, reducing electrical noise that produces hum or interference in audio systems. They're most useful in high-sensitivity audio setups and rooms with long signal runs. A dedicated circuit alone addresses most noise issues in typical home theater builds.
What low-voltage wiring should be run before walls are closed? Before closing walls, run speaker wire to every planned speaker location, an HDMI conduit from the projector position to the AV rack, and at least two Cat6 cables to the rack. Also pull a conduit sleeve for the projector-to-rack run so you can pull new cable in the future without opening the wall. Doing this at rough-in costs almost nothing. Retrofitting after walls are finished can cost thousands.
Should I use a UPS or power conditioner for my home theater projector? A UPS provides battery backup so the projector can complete its cool-down cycle if power cuts out abruptly. Most projectors benefit from clean shutdown rather than sudden power loss. A power conditioner filters electrical noise from the line but doesn't provide backup. For projectors specifically, a UPS sized to 1,000 to 1,500 VA is more protective than a conditioner alone.
For the complete Bay Area home theater planning guide collection, visit Bay Area Home Cinema.